One of the key advantages of the Hive Projects Task Management tool is its seamless integration with workflows, allowing you to automate task creation directly within your workflow processes. This eliminates manual steps, saves time, and ensures that no task falls through the cracks. In this article, we'll explore the simple steps involved in creating tasks directly from your workflow, empowering you to manage projects more efficiently than ever before. Watch the video bellow or you follow the steps that follows.

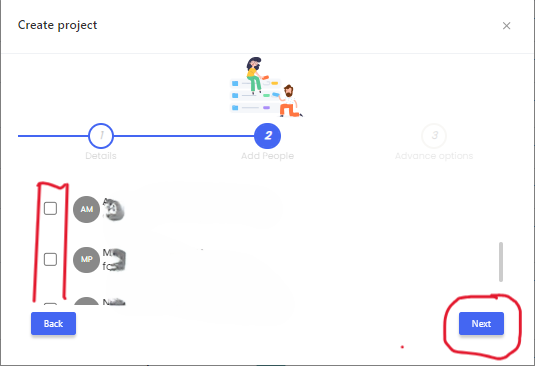
Add the name of the project, with the description of the project to enable the Button NEXT. Then you click NEXT

Add project members of your choice to the project. This is optional.
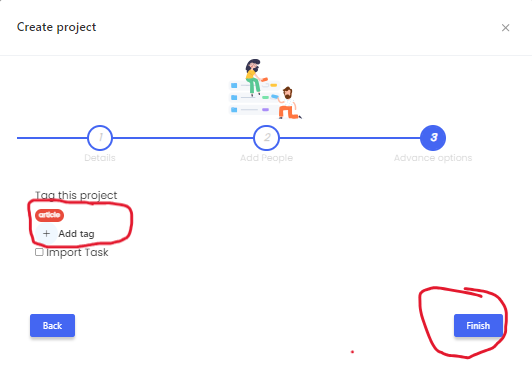
You can add a tag to the project, which can be used in other areas. This is optional.
Step 2: Add columns in your project.

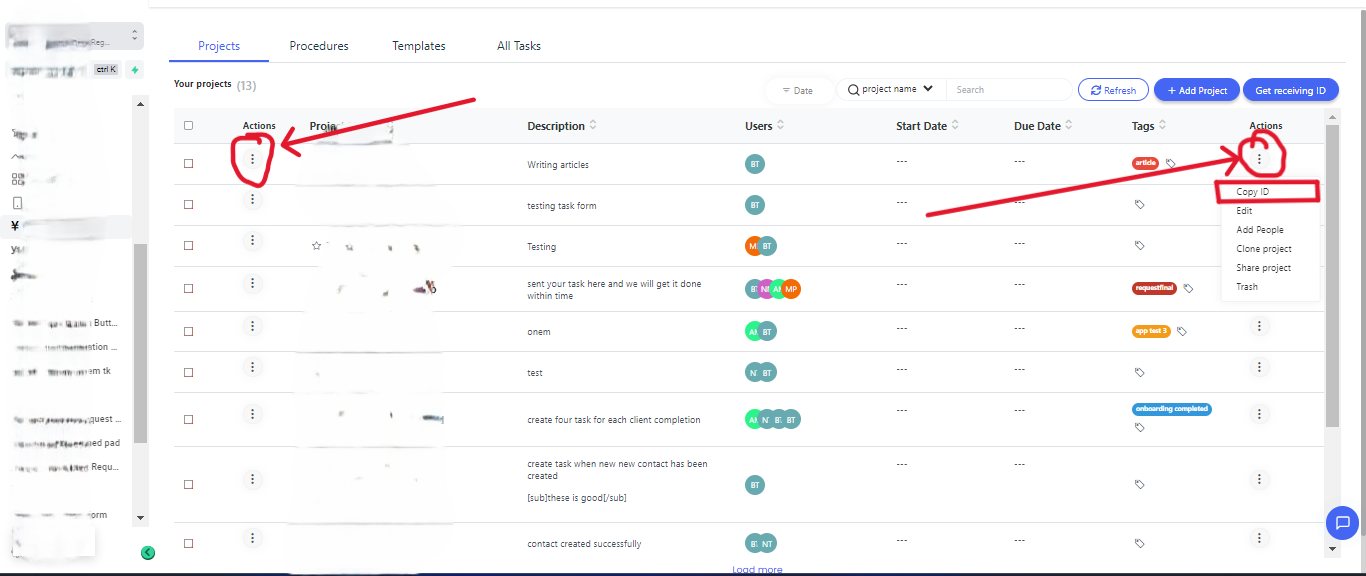
Step 3: Get the Project ID
2. Workflow in My Studio Manager
Step 1:
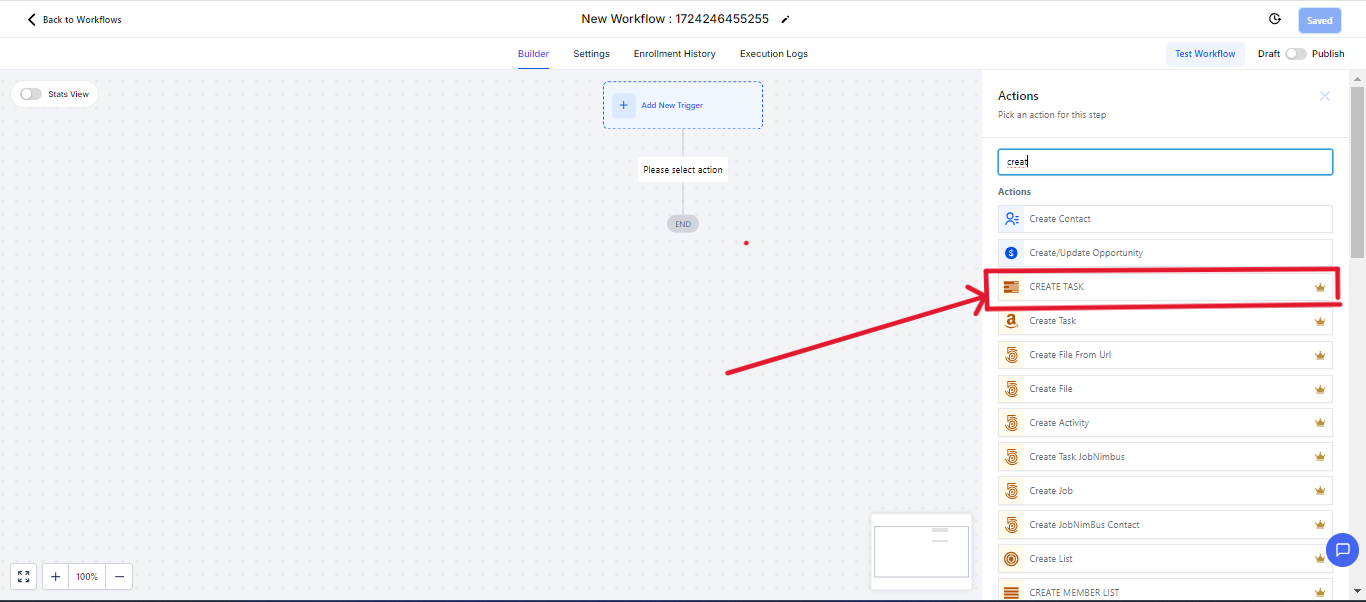
In the bellow steps, since we have the project ID, we head to our workflow. Create a workflow>>>Add a Triger of your choice.>>> Add an action CREATE TASK.
Step 2: Adding the Project ID we copied from the Project.
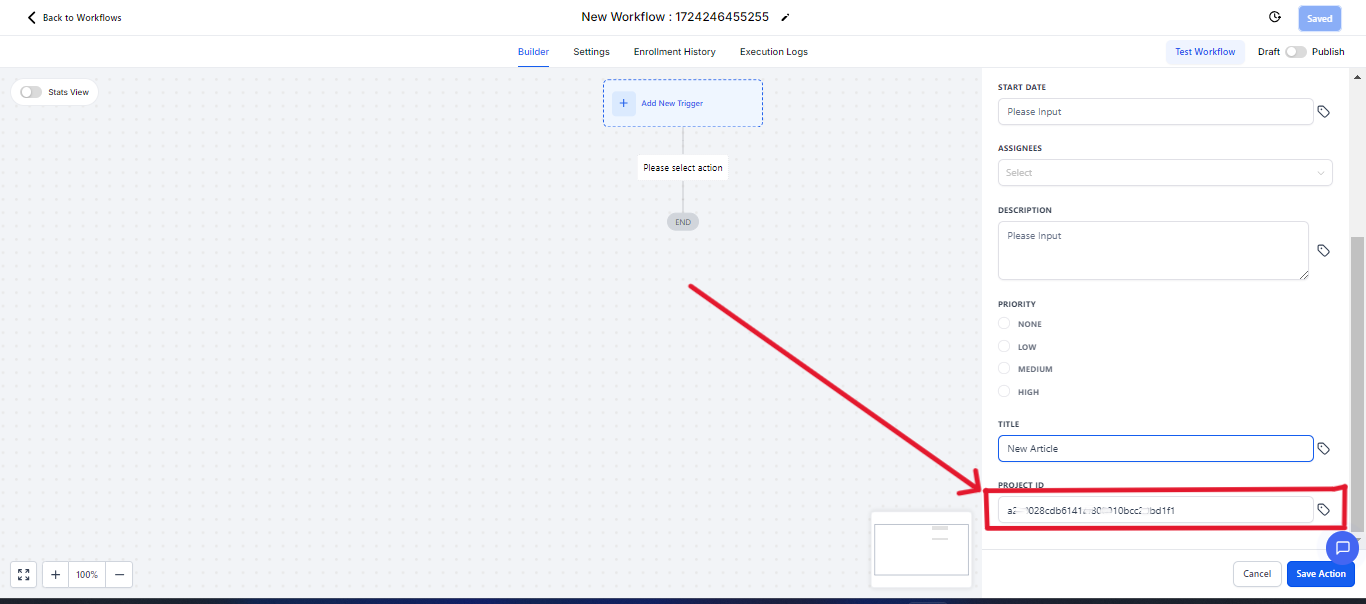
Once you add the project ID, you head on and field the necessary fields and save.
Your Workflow should look like this when you save. Then you hit on publish
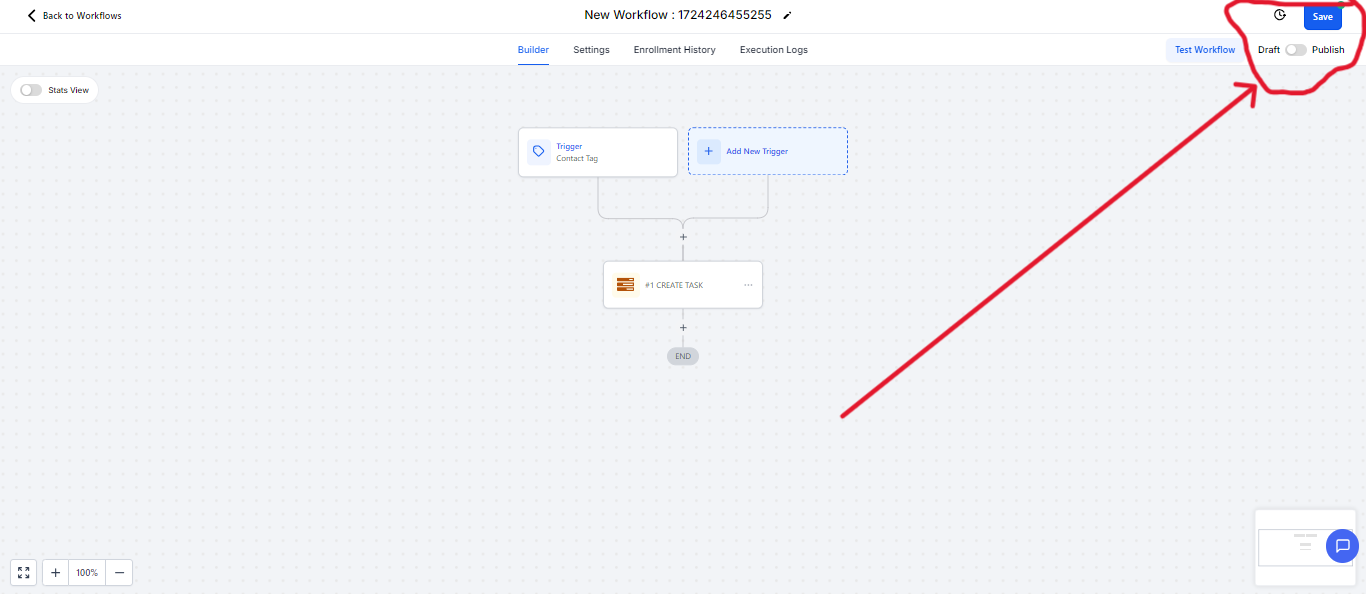
NB You can add as many actions in your workflow.
You can use this to create tasks whenever any trigger of your choice that you added is triggered.
