Setting up a class in My Studio Manager involves creating three connected items:
Season (optional) – defines a date range for a series of classes (useful for term‑based programmes).
Category – groups calendars by age group, style or purpose.
Calendar (class schedule) – the specific class schedule with dates, times, teacher, location and capacity.
Seasons are optional; you can schedule classes without them, but they make it easier to organise term‑based programmes.
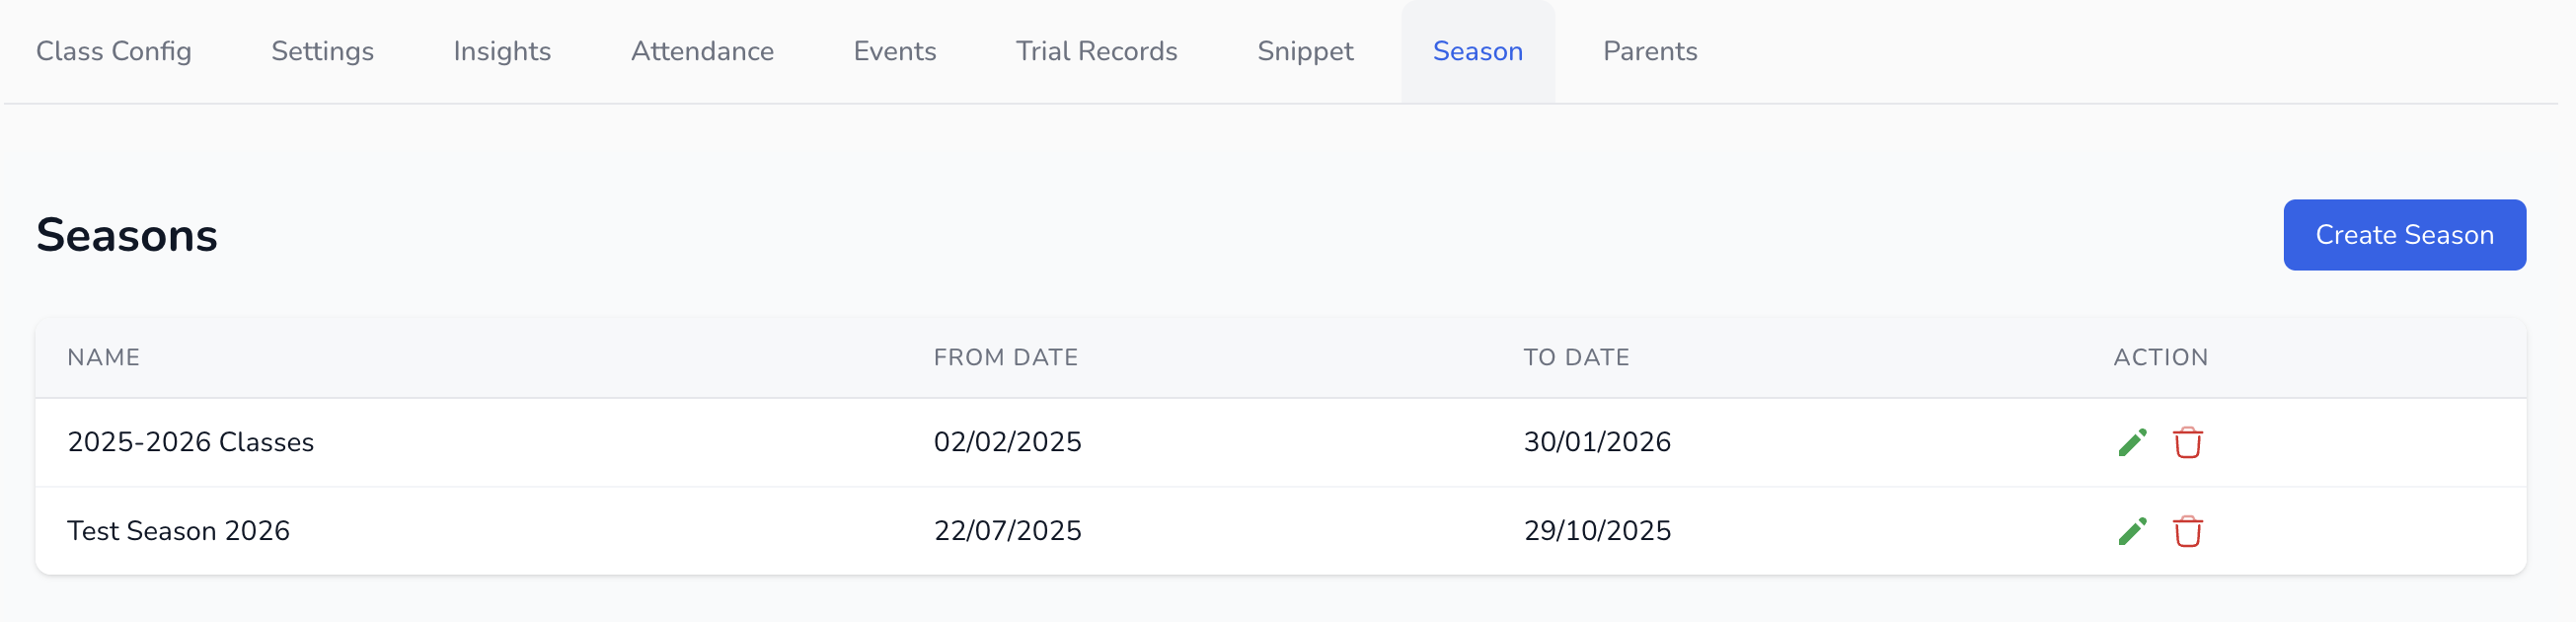
From the Class Manager dashboard, select the Season tab.
Click Create Season. A form appears asking for:
Season Name – e.g. “Summer Term 2026”.
From Date and To Date – choose the start and end dates using the date picker.
Click Save. The new season appears in the season table with its date range.
Tip: you can edit or delete a season later using the pencil and trash icons in the season table.
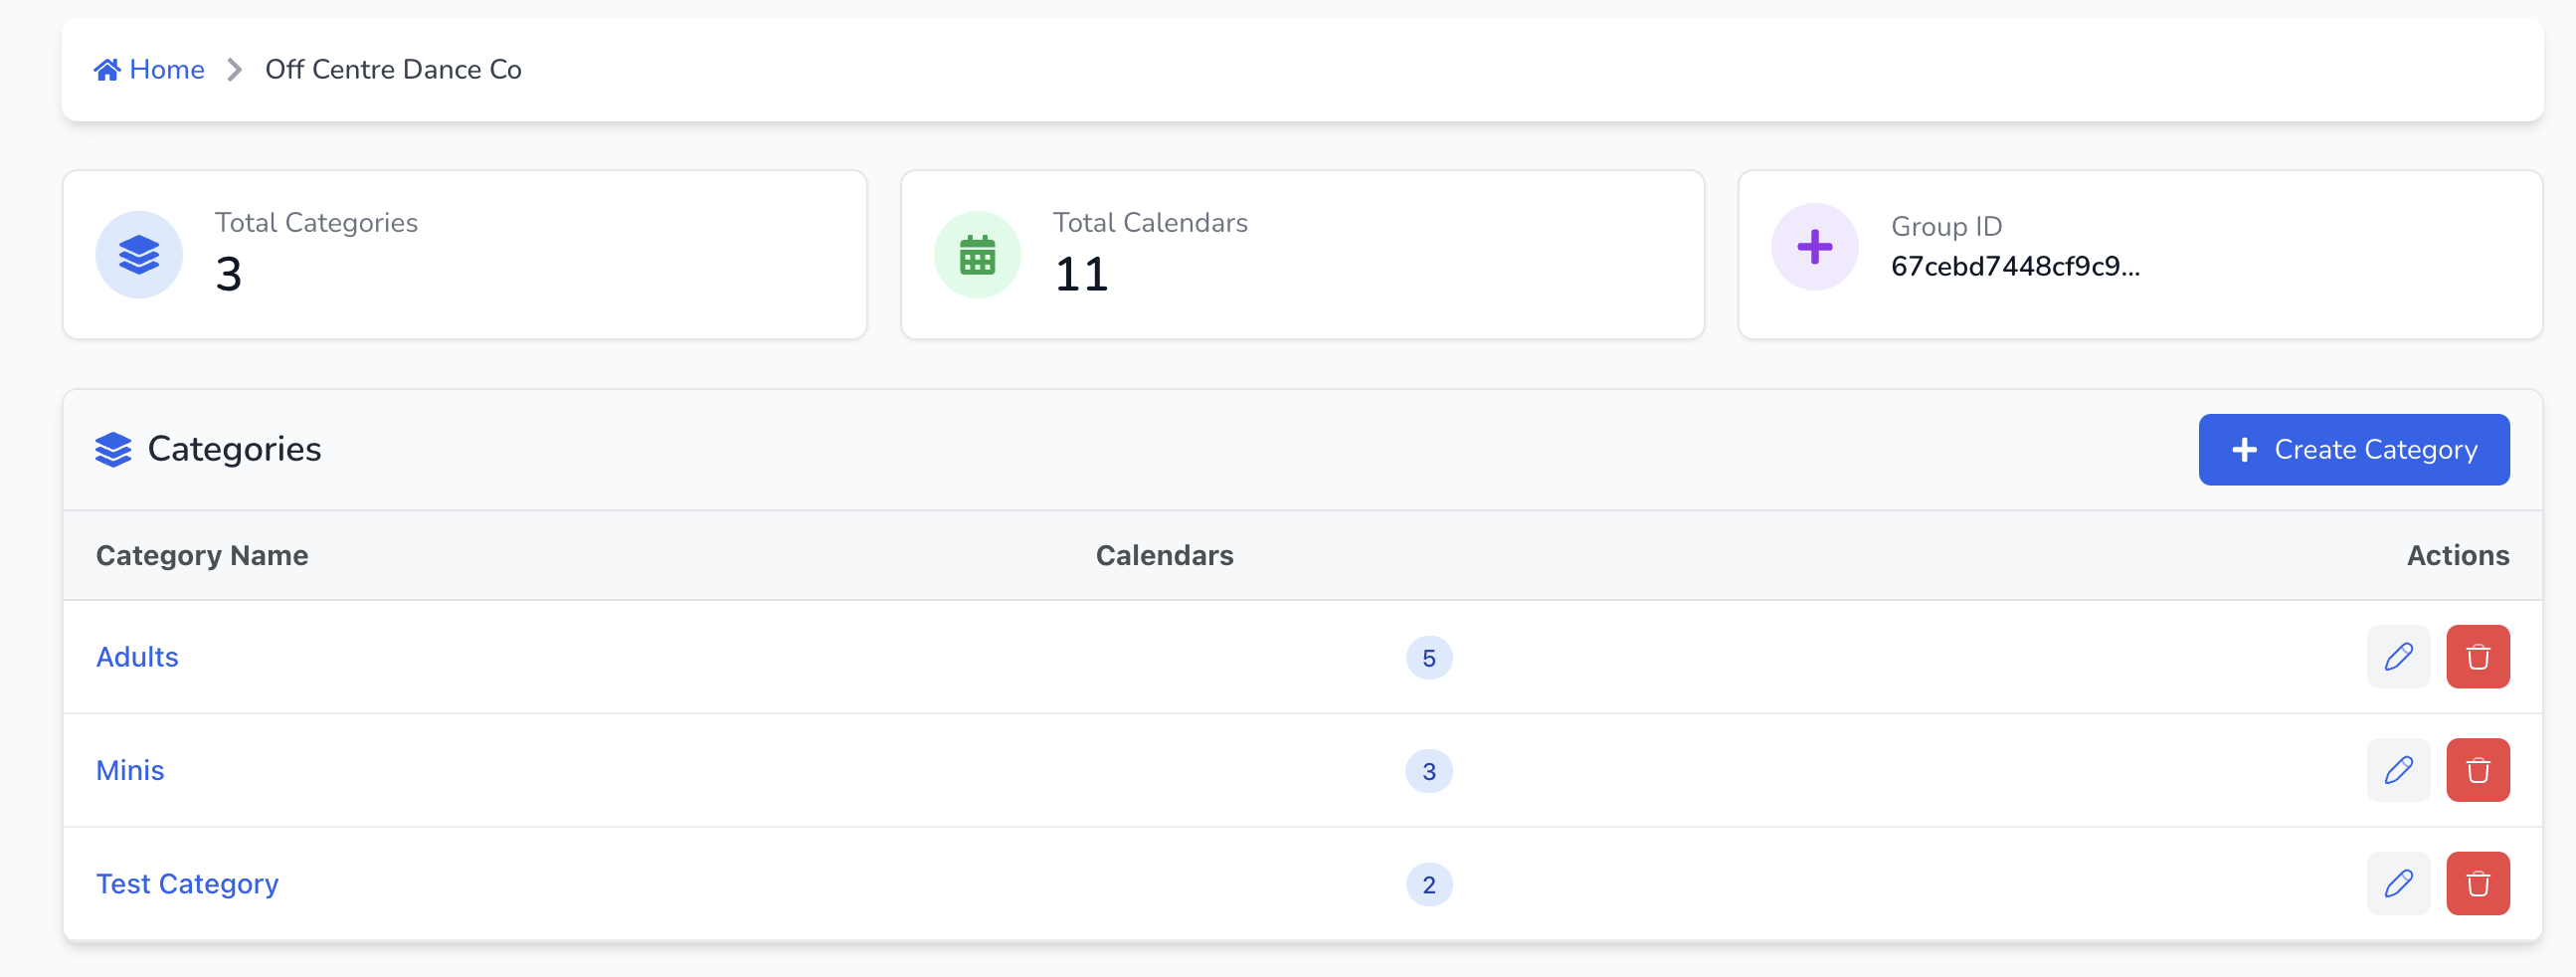
Categories organise your calendars (classes) by age group, level or any grouping you need.
Go to Class Config → choose your Group (e.g. Off Centre Dance Co) and click the yellow pencil icon to edit it.
Under Categories, click Create Category.
Enter a Category Name (e.g. “Adults”, “Minis” or “Test Category”) and click Save. The new category appears in the list.
Go to Class Config → choose your Group (e.g. Off Centre Dance Co) and click the yellow pencil icon to edit it.
Under Categories, click Create Category.
Enter a Category Name (e.g. “Adults”, “Minis” or “Test Category”) and click Save. The new category appears in the list.
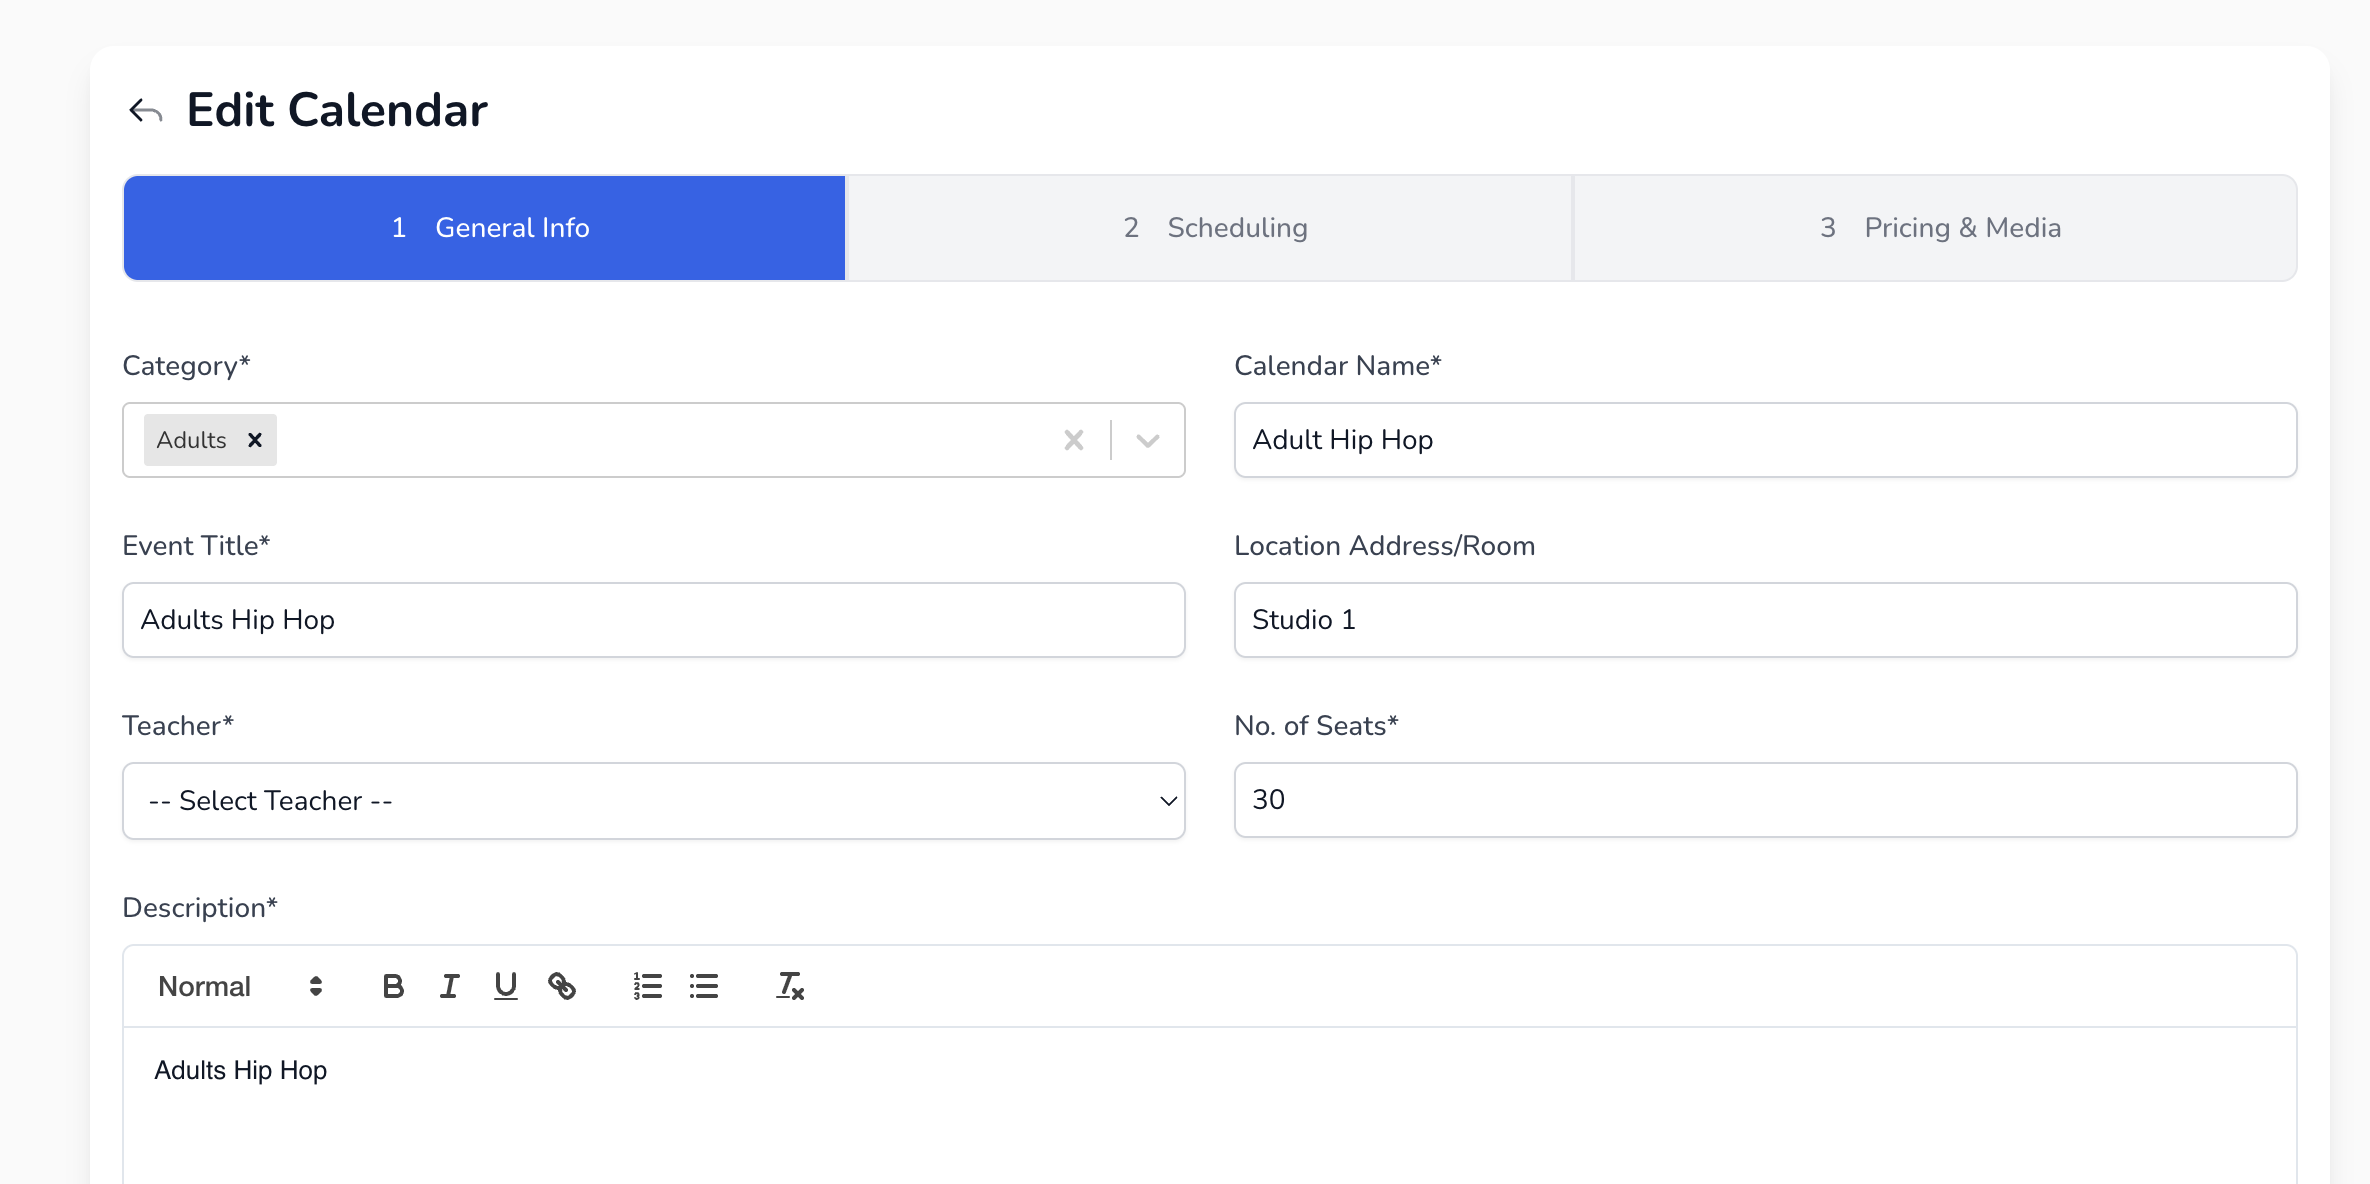
A calendar is the actual class schedule. Each calendar belongs to one category and can have one or more sessions.
In the same group screen, under Calendars, click Create Calendar.
In the General Info tab:
Category – select the category created in the previous step (e.g. Adults).
Event Title – name of the class (e.g. “Tap Class Monday 6 pm”).
Location – name of your studio room or venue.
Teacher – choose from the teacher list.
Seats – maximum number of students.
Description – a short description for parents/students (this appears on the booking page).
Click Next.
In the Scheduling tab:
Selection Type – leave as Custom selection or choose Season wise if you want to schedule within a season. If you select Season wise, click Add Season, pick the season created earlier, and specify the recurrence (daily or weekly). The system fills the date range automatically.
Start Date (Custom Selection) – choose the date of the first class.
Start Time and End Time (Custom Selection) – pick times from the dropdown (scroll to the desired time). You can also select the Time Zone (e.g. Australia/Sydney).
Repeat (Custom Selection) – choose Weekly if the class repeats weekly. A list of available dates appears; select the dates you want and click Add events to group. You can create a new group (series) or add to an existing group. The selected dates appear as tags in the Event Groups section.
Click Next.

In the Pricing & Media tab:
Booking Fee – optional; leave at 0 if you want the class to be free or if you want to process charges for this class externally.
Advanced Pricing – toggle to create per‑event or per‑season prices (useful for monthly/termly billing). For example, you can set a price for the entire season or for a grouped event using the drop‑down options.
Upload images for the parent portal and website or leave blank.
Click Save to finish creating the calendar.

After saving, the new class appears in the group’s calendar list. If you scheduled it correctly, the class also appears in the Calendar View under the appropriate dates and times.
